Page 1 of 3 1 2 3 LastLast
Results 1 to 15 of 31

Thread: Tyler's Mods

  1. #1
    Member Since
    Feb 2007
    Location
    '01, Proton, VehiCROSS, 0229
    Posts
    631
    Thanked: 15

    Tyler's Mods

    Never really posted anything like this. I'm always on the site getting the info I need to do what I want to do with the VX. I've been driving another vehicle AND separately working on my VX (here and there, not constantly) since Feb 2012 and I'm 98% finished (for real). I'll definitely be ready by Moab. I get soooo many emails and questions on how I did certain things, I thought I would just take the time and give back to this awesome family of ours... So I'm sharing the restoration experience of my VX with everyone here. This has definitely been a journey. I'm hoping that this thread may help others. I'm going to be a little vague in some of the tools and techniques used to keep things shorter however if anyone would like more feedback on something particular, no problem shoot me an email! I have documented so much information during this process, it's really ridiculous... but hey, maybe it will come in handy for someone at some point. I love this forum and I love to help anytime I can!

    Long story short...
    There was a lot of little things wrong with my VX. I also had accumilated tons of stuff that I wanted to install... so at some point I decided to fully restore the VX and add all the stuff to make it the truck I always wanted.

    NOTE: The original thread here was pointing to pics that I uploaded to my gallery. I have changed this so that there is less load on the server. Now, all of the pics are being pulled from my Photobucket account. Click on any image to enlarge. Although I participate throughout the site, I expect this particular thread to be long as this will serve as the single spot that I document each and everything I do to my personal VX. I also have a back up plan if Photobucket fails. I have this entire "story" also documented elsewhere in the exact same form and then backed up in a couple of different places, so if I have to duplicate it again (copy/paste) no problem. If any of the pics don't show up, msg me and I'll fix it. I don't have all my Photobucket pics posted, so if you want to see more pics (different angles of the same thing) then visit my Photobucket. Enjoy!


    Interior

    --------------------------------------------------------------------------
    Remove Interior Components

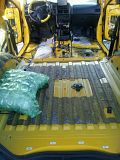
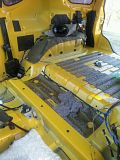
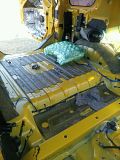
    Seats, sub woofer box, sub amp, mid amp, all 4 mids including brackets, all 4 tweets including brackets, headliner w/sun visors & "oh sh*t" handles, all interior panels, carpet, all padding including floorboard area and firewall, seat belt assemblies, door-mounted mirrors, center console & related parts, rear tire holder and bracket and maybe more but I can't remember, but basically everything but the actual dash and dash components (which will be later)
    --------------------------------------------------------------------------
    Clean Surfaces
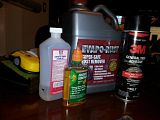
    I used a Paint Scraper and good high end razor (w/plenty of replacement blades) to remove the rough stuff... such as removing the padding from the bottom of the carpet, removing the gluey stuff left behind. I could have just ripped and scrape everything out quickly, but I wanted to take my time as to not scratch patches of paint off since the layers of paint on the interior are THIN. I didn't want to be concerned about rust, so I took my time and removed everything...without damaging the interior paint. For removing the Acoustic Sealant (the black sticky stuff) that is used to fasten the plastic protector on the door panel and to fasten the carpet to the floor, I used (gently) the paint scraper to get the majority of it off, followed by Adhesive Remover made by DUCK (has an orange plastic scraper as the cap and is about $10 or so, much better than GooGone) works WONDERS on removing this stuff. Use the top of the bottle and insert it onto your thumb or a finger. Yes, it will hurt after a while of scraping, but you will NOT damage the paint this way as the top is plastic and doesn't scratch... and finally going over all metal surfaces with 91% rubbing alcohol to make sure the surface is ready for new adhesive.

    UPDATE: Looking back, since I was planning on installing Dynamat (which uses the same adhesive material) I would have done everything the same, except I should have just left the black adhesive "stuff" on the door. The backside of the Dynamat is the same black adhesive. There was really no point in removing it, guess I wasn't thinking and just got to crazy with it.


    While I'm at it, thought I would fix a few other things that were right there in front of me. Using CLR, clean and remove rust on:
    - the metal plate where the shifter is mounted in center console
    - the plate for the ABS Module under the passenger seat
    -any holes that have been drilled in the frame to mount amps, etc.

    --------------------------------------------------------------------------
    Apply Dynamat Extreme
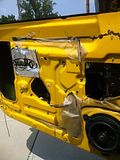
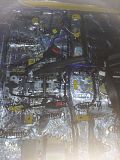
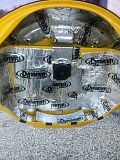
    Note: I actually paid a reputable car audio place to install dynamat on both my doors and I paid retail. Once I took the door panels off and saw what I actually paid for... I WAS PISSED! Look back at the first pics, under Remove Interior Components and look at the last 2 pics, this is the quantity of dynamat that they use if you pay for them to dynamat your doors. If you are going to pay someone to do this, make sure you review their work before it's paid for, but I HIGHLY recommend doing yourself. Clean everything up, lube the window tracks, make any adjustments for the window issue

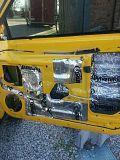
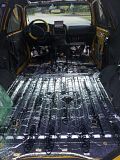
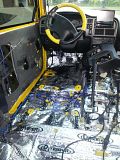
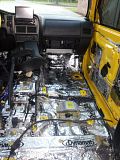
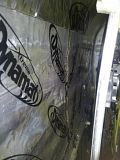
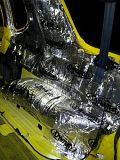
    Using the MEGA Pack sized Dynamat sheets (24"x 48" per sheet) I covered the entire interior with Dynamat Extreme. I used as large of sheets as possible. Smaller "left-overs" were used for inconspicuous areas and to connect larger pieces. I kept most med to large pieces for future use. Ensured that all tension was relived in "troubled areas" by adding "tension slits" and to eliminate any air bubbles. I used the professional Dynamat Roller to finalize the install. I cut holes in any area where there is a pre-drilled hole and any areas where something will attach to the frame such as panel retainers (a must) and... important: make sure to cut out the area a bit larger than needed so you have room for the bolt head or plastic fastner to fit w/out touching the Dynamat. You want to be able to remove a panel in the future without ripping the Dynamat from the wall as you pull the panel off.


    --------------------------------------------------------------------------
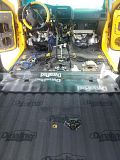
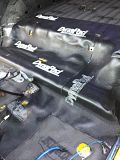
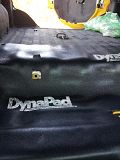
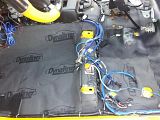
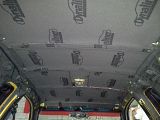
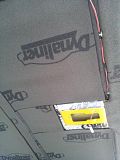
    Apply DynaLiner and DynaPad

    FLOOR - DynaPad (in center of floor, replaces OEM padding attached to carpet underside), 1/4" DynaLiner from under seats forward to the front fire wall including center console area, 1/8" for trimming around edges and tight areas.


    ROOF - 1/2" DynaLiner in the deep pockets of the roof (where Isuzu had original roof padding installed). Some areas used 1/4" DynaLiner while the remaining areas used 1/8" DynaLiner to ensure complete coverage


    Last edited by tysamigo : 02/23/2014 at 07:54 AM Reason: added new info
    ---------

    Ty

  2. #2
    Member Since
    Feb 2007
    Location
    2000 Proton VX - 0776
    Posts
    9,258
    Thanked: 0
    Wow ... impressive.
    [SIGPIC][/SIGPIC]

    Put a smiley after you say that Bub.

  3. #3
    Member Since
    Jun 2002
    Location
    2001 Ebony S/C #1304
    Posts
    3,647
    Thanked: 10
    Looks like mine all gutted out. Now you need to get a S/C to help push that extra 500lbs.

    (mine is a hog after Dynamatting.... HEEEEEEEAVY!)
    Gary Noonan
    '01 S/C VX / '18 Forester XT

  4. #4
    Member Since
    Jun 2002
    Location
    Former owner of '01 Ebony #0739
    Posts
    1,579
    Thanked: 5

    Thumbs up

    Quote Originally Posted by tysamigo View Post
    - Will be ordering replacement of all body bolts and cladding screws in stainless
    Part #s and/or please...
    The only thing we have to fear is fear itself... and zombies.


    My VehiCROSS

  5. #5
    Member Since
    Feb 2007
    Location
    '01, Proton, VehiCROSS, 0229
    Posts
    631
    Thanked: 15
    Quote Originally Posted by nocturnalVX View Post
    Part #s and/or please...
    OK. Another week or so to complete Dynapadding, then next is ordering all that stuff (bolts, screws, etc.) and I'll keep you posted...


    Quote Originally Posted by WormGod View Post
    Looks like mine all gutted out. Now you need to get a S/C to help push that extra 500lbs.

    (mine is a hog after Dynamatting.... HEEEEEEEAVY!)
    Yea, in fact I hadn't even thought about the weight whatsoever... that is until I lifted the first sheet out of the box. The whole vehicle wrapped as I've done was 17 Sheets (24"x48")!!! That's 1 sheet shy of 2 cases. When I close the doors now though... OMG, they sound like they are SOLID and like a TANK, especially the tailgate. It sounds almost like a small vault door lol

    Quote Originally Posted by tom4bren View Post
    Wow ... impressive.
    Thank you!! Out of the 12 vehicles I've owned over the years, this is the FIRST vehicle and the FIRST time I've ever performed mods myself. I always had someone else do it. I tell you what.... doing everything that I'm doing is so satisfying because I'm learning every single day more and more that I never knew about the VX and about vehicles in general. I just love it and I think the outcome is going to be awesome... maybe even put her in a few local auto shows
    Last edited by tysamigo : 02/22/2014 at 09:35 PM

  6. #6
    Member Since
    Jun 2010
    Location
    99, Silver, 1784
    Posts
    854
    Thanked: 0
    Straight up inspiration right there.

    Good for you, Ty. All around.
    -V
    -VI VX VNIVERSVM VIVVS VICI-

  7. #7
    Member Since
    Feb 2007
    Location
    '01, Proton, VehiCROSS, 0229
    Posts
    631
    Thanked: 15
    I have to hault all work on my VX and unfortunately will NOT be able to attend Moab

    While working on the VX I had to go to the Emergency Room for an EXTREME pain in my left bicep... after the MRI it turns out I have a large cist IN my left bicep which is also causing nerve damage and must have surgery. I will be down for a few weeks and won't be able to continue on my project which will put me behind in having the truck ready for Moab.

    I'll be in touch in a few weeks...

  8. #8
    Member Since
    Nov 2009
    Location
    2001Proton 1432, ex 2001 Dragon Green Mica 0168 (RIP May 2017)
    Posts
    3,590
    Thanked: 31
    Sorry to hear this Ty.

    God bless you and swift recovery...glad that they found it now...
    Live, Love, Forgive and Never Give Up

  9. #9
    Member Since
    Feb 2007
    Location
    '01, Proton, VehiCROSS, 0229
    Posts
    631
    Thanked: 15

    Update:

    UPDATE:

    I haven't been able to enjoy my VX since January. I had to suspend work on it in May and am just now able to start where I left off.

    Next Monday the VX gets a new paint job, same Proton yellow. I'm going for showroom quality and am expecting great results from a proven local who is known for working on projects like this. I've got a new hood insert coming (thanks John ) and will be CF while the VX is painted.

    I've made more progress but lost all my pics...I'm thinking by the end of this coming weekend, I'll have new pics and post the most recent progress. Although I don't have long hours every day as I did earlier this year, I do now have a schedule that allows me to work on the VX again...just at a slower pace.

    Oh yeah and on a separate note, I am still disappointed I wasn't able to make Moab, but I will next year for sure.

  10. #10
    Member Since
    Jun 2002
    Location
    2001, Proton Yellow, #0580
    Posts
    1,887
    Thanked: 5
    Lookin good - wish I had time to do that...
    John Eaton
    Original Owner
    2001 Proton Yellow #580
    Atlanta GA

    http://wildtoys.com/vehicross/
    http://vehicross.blogspot.com/

    "Metaphors be with you"

  11. #11
    Member Since
    Feb 2007
    Location
    2000 Proton VX - 0776
    Posts
    9,258
    Thanked: 0
    Glad you're on the mend & back into the VX frame of mind. Best o luck as your mods continue.

  12. #12
    Member Since
    Feb 2009
    Location
    1999,silver, 1516
    Posts
    905
    Thanked: 0
    Quote Originally Posted by tom4bren View Post
    Glad you're on the mend & back into the VX frame of mind. Best o luck as your mods continue.
    *2

  13. #13
    Member Since
    Jul 2012
    Location
    2001, Proton Yellow, VX, #0386
    Posts
    298
    Thanked: 0
    Wow, Tyler. Very impressive! I will be watching this thread very closely... Makes me want to do the same dynamat work for improving road noise levels. Are you sure you want to get a paint job before going to Moab? Wouldn't that make you scared to get it all scratched up?

  14. #14
    Member Since
    Jul 2005
    Location
    Former 00' Kaiser #0804, 98 White 4Runner SR5
    Posts
    3,761
    Thanked: 0
    Theres only 2 trails i can think of in the hundreds there that you would ever need to worry about trail rash. Most of moab is just driving around the rocks
    "Do Not Seek Praise. Seek Criticism."

    "If You Can't Solve A Problem, It's Because You're Playing By The Rules."

    "The Perosn Who Doesn't Make Mistakes Is Unlikely To Make Anything."

    -Paul Arden

  15. #15
    Member Since
    Jul 2012
    Location
    2001, Proton Yellow, VX, #0386
    Posts
    298
    Thanked: 0
    Ahhhhh... most of my experience with running the trails involves scraping through lots of branches and bushes and then occasionally sliding into a tree requiring me to rock, back and forth along the tree in an attempt to get myself unstuck.

Similar Threads

  1. mods mods mods on the mind.
    By ABDragonVX in forum VX Modifications...
    Replies: 34
    Last Post: 03/09/2013, 09:51 PM
  2. Mods, Mods, Moab, Mods
    By ND92 in forum VX Modifications...
    Replies: 36
    Last Post: 05/08/2012, 08:35 AM
  3. First VX mods =]
    By Breezy in forum VX Modifications...
    Replies: 2
    Last Post: 08/06/2011, 06:39 PM
  4. Little mods of my JDM ;-)
    By CIAUS in forum VX Modifications...
    Replies: 12
    Last Post: 10/28/2009, 01:18 PM
  5. Tyler's Window Problem
    By tysamigo in forum VX Talk...
    Replies: 8
    Last Post: 05/20/2007, 01:11 PM

Posting Permissions

  • You may not post new threads
  • You may not post replies
  • You may not post attachments
  • You may not edit your posts
  •  
$lv_vb_eventforums_eventdetails