Never really posted anything like this. I'm always on the site getting the info I need to do what I want to do with the VX. I've been driving another vehicle AND separately working on my VX (here and there, not constantly) since Feb 2012 and I'm 98% finished (for real). I'll definitely be ready by Moab. I get soooo many emails and questions on how I did certain things, I thought I would just take the time and give back to this awesome family of ours... So I'm sharing the restoration experience of my VX with everyone here. This has definitely been a journey. I'm hoping that this thread may help others. I'm going to be a little vague in some of the tools and techniques used to keep things shorter however if anyone would like more feedback on something particular, no problem shoot me an email! I have documented so much information during this process, it's really ridiculous... but hey, maybe it will come in handy for someone at some point. I love this forum and I love to help anytime I can!
Long story short...
There was a lot of little things wrong with my VX. I also had accumilated tons of stuff that I wanted to install... so at some point I decided to fully restore the VX and add all the stuff to make it the truck I always wanted.
NOTE: The original thread here was pointing to pics that I uploaded to my gallery. I have changed this so that there is less load on the server. Now, all of the pics are being pulled from my Photobucket account. Click on any image to enlarge. Although I participate throughout the site, I expect this particular thread to be long as this will serve as the single spot that I document each and everything I do to my personal VX. I also have a back up plan if Photobucket fails. I have this entire "story" also documented elsewhere in the exact same form and then backed up in a couple of different places, so if I have to duplicate it again (copy/paste) no problem. If any of the pics don't show up, msg me and I'll fix it. I don't have all my Photobucket pics posted, so if you want to see more pics (different angles of the same thing) then visit my Photobucket. Enjoy!
Interior
--------------------------------------------------------------------------
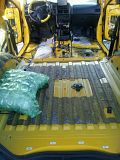
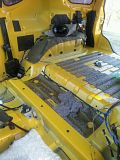
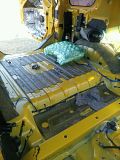
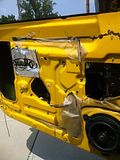
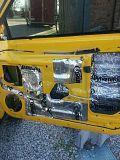
Remove Interior Components
Seats, sub woofer box, sub amp, mid amp, all 4 mids including brackets, all 4 tweets including brackets, headliner w/sun visors & "oh sh*t" handles, all interior panels, carpet, all padding including floorboard area and firewall, seat belt assemblies, door-mounted mirrors, center console & related parts, rear tire holder and bracket and maybe more but I can't remember, but basically everything but the actual dash and dash components (which will be later)
--------------------------------------------------------------------------
Clean Surfaces
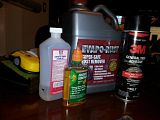
I used a Paint Scraper and good high end razor (w/plenty of replacement blades) to remove the rough stuff... such as removing the padding from the bottom of the carpet, removing the gluey stuff left behind. I could have just ripped and scrape everything out quickly, but I wanted to take my time as to not scratch patches of paint off since the layers of paint on the interior are THIN. I didn't want to be concerned about rust, so I took my time and removed everything...without damaging the interior paint. For removing the Acoustic Sealant (the black sticky stuff) that is used to fasten the plastic protector on the door panel and to fasten the carpet to the floor, I used (gently) the paint scraper to get the majority of it off, followed by Adhesive Remover made by DUCK (has an orange plastic scraper as the cap and is about $10 or so, much better than GooGone) works WONDERS on removing this stuff. Use the top of the bottle and insert it onto your thumb or a finger. Yes, it will hurt after a while of scraping, but you will NOT damage the paint this way as the top is plastic and doesn't scratch... and finally going over all metal surfaces with 91% rubbing alcohol to make sure the surface is ready for new adhesive.
UPDATE: Looking back, since I was planning on installing Dynamat (which uses the same adhesive material) I would have done everything the same, except I should have just left the black adhesive "stuff" on the door. The backside of the Dynamat is the same black adhesive. There was really no point in removing it, guess I wasn't thinking and just got to crazy with it.
While I'm at it, thought I would fix a few other things that were right there in front of me. Using CLR, clean and remove rust on:
- the metal plate where the shifter is mounted in center console
- the plate for the ABS Module under the passenger seat
-any holes that have been drilled in the frame to mount amps, etc.
--------------------------------------------------------------------------
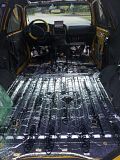
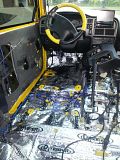
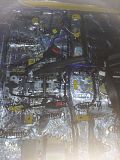
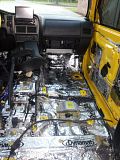
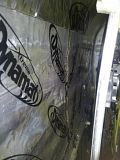
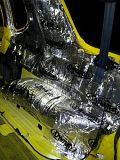
Apply Dynamat Extreme
--------------------------------------------------------------------------
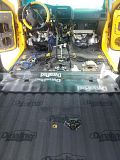
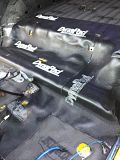
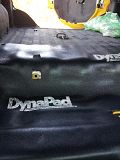
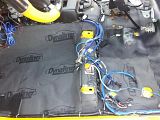
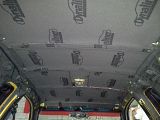
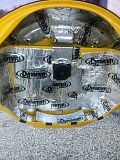
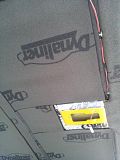
Apply DynaLiner and DynaPad






 Reply With Quote


 ) and will be CF while the VX is painted.

