Page 4 of 6 FirstFirst 1 2 3 4 5 6 LastLast
Results 46 to 60 of 82

Thread: 1/10 Scale VX RC-Crawler

  1. #46
    Member Since
    Dec 2005
    Location
    Former Owner of 'ZEUS' aka 1031
    Posts
    3,185
    Thanked: 1
    Sorry about the link fail.

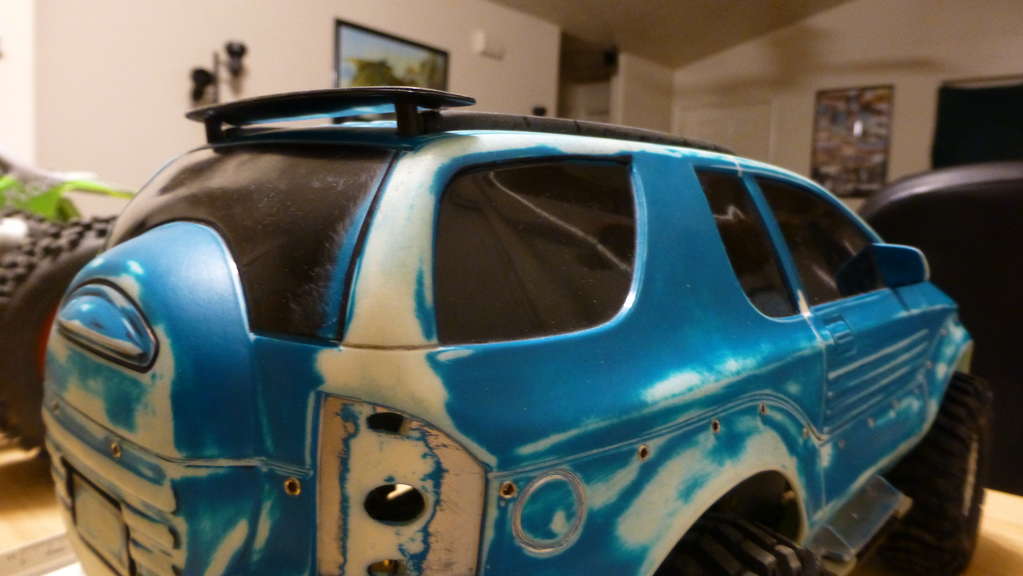
    I took to work on the roof rails & spoiler today. I'm not finished but it looks much much better! Here is a comparo of the stock & modified:


    Stock & modified - Mounted:


    Tall spoiler & stock rail:


    Modified spoiler & rail:


    Modified - Mounted:


    Here is the before:


    ...And after:
    Sent from my "two hands on a keyboard"

  2. #47
    Member Since
    May 2006
    Location
    SOLD!
    Posts
    7,257
    Thanked: 2
    Its coming along!! You gonna mount a basket with spare?

    Bart

  3. #48
    Member Since
    Dec 2005
    Location
    Former Owner of 'ZEUS' aka 1031
    Posts
    3,185
    Thanked: 1
    Not sure... if I did, I would probly try to make my own Thule/Zeus style one. The utilitarian baskets on the market are too big or too small for the VX roof but something could be made out of brass rod easily enough. The 37" TIRE BARELY FITS ON THE ROOF WITHOUT A BASKET - oops didn't mean to yell. To me, a VX with a giant basket full of tire looks like a British woman with one of those goofy hats! Haha

  4. #49
    Member Since
    May 2006
    Location
    SOLD!
    Posts
    7,257
    Thanked: 2
    Yeah, well, up top looks better than bolted to the tailgate!

    Bart

  5. #50
    Member Since
    Dec 2005
    Location
    Former Owner of 'ZEUS' aka 1031
    Posts
    3,185
    Thanked: 1
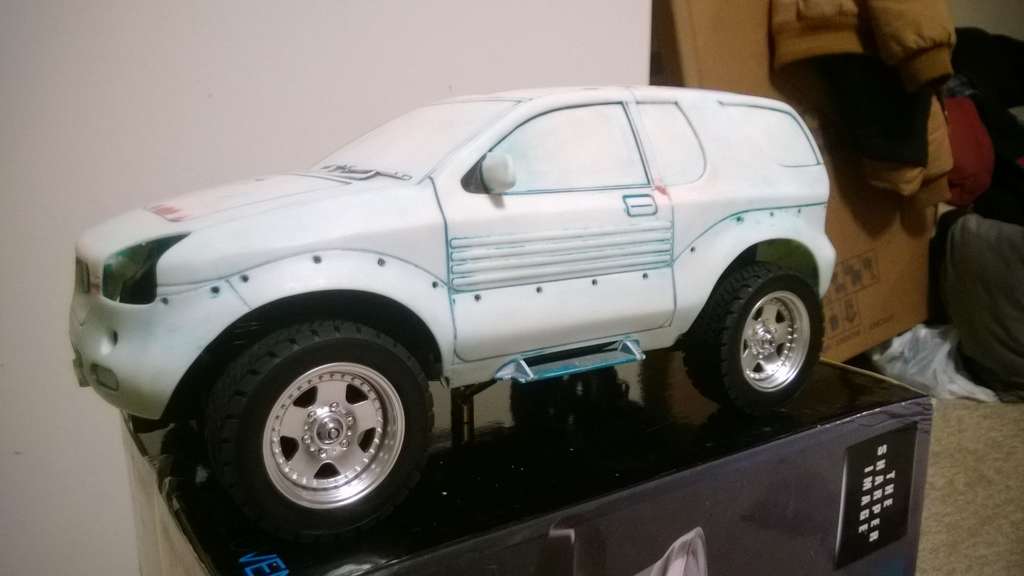
    Made some more progress this week. In one night (Wednesday) I had three issues develop. I was filling & sanding the roof rails & started noticing hairline fractures in each of them. Added some CA glue in between the cracks & some more filler & seem to be back on track. Then while I was using brake fluid on the body to remove the paint (read it was a viable option) I broke the rear spoiler in two. Glue & sanding was making the spoiler look great... and then it cracked in another spot! More glue, more sanding... it looks good again. Then because the brake fluid yielded poor results, I gave the body a good washing & tried using the graffiti remover that's for my vinyl fence. I think the brake fluid made the spoiler brittle & the graffiti remover made the body soft. I found a few spots where it looks like the plastic started to bubble! AGH! I gave it a good washing again really fast. So... instead I made the decision to sand the entire body... so far, it has taken several hours over three days... I'm using 80, 100, 120, 180, 220, & 320 grit sanding sponges & small hobby files.

    This weeks progress:

    Several passes of filler & sanding looks like this midway:


    After another round of sanding, they look like this:


    The body now looks like a VehiGHOST or VehiTRON - I have started using filler on the roof:


    So here is how everything is for now:


    I picked up some styrene & could start cutting out pieces in order to reshape portions of the body this week... but I am still adjusting some of the seam lines here & there too... I have a tough decision to make on that & will explain that in more detail later.
    Last edited by ZEUS : 11/11/2013 at 10:29 AM

  6. #51
    Member Since
    May 2006
    Location
    SOLD!
    Posts
    7,257
    Thanked: 2
    Man, good progress. Gotta be careful with those harsh chemicals on that plastic. Have you tried just Mineral Spirits?

    Bart

  7. #52
    Member Since
    Dec 2005
    Location
    Former Owner of 'ZEUS' aka 1031
    Posts
    3,185
    Thanked: 1
    I'm sure I have mineral spirits somewhere but can't find it - you know how my house is! Haha I'm glad I sanded the whole thing anyway because I got rid of some high spots & pointed out some low spots. The windows were the toughest parts to get thru. They had the blue paint & then the black paint on top so there was quite a bit of color on there. I truthfully think sanding did not take much more time than using chemicals would have being that I still would have needed to sand before & after primer anyway.

  8. #53
    Member Since
    Dec 2005
    Location
    Former Owner of 'ZEUS' aka 1031
    Posts
    3,185
    Thanked: 1
    Not a whole lot of progress this week - lots of research though!
    With the styrene I acquired I got to measuring, sketching, transferring, cutting, & filing something I find important for the project design.
    I clamped down my Dremel & then clamped down a make-shift cutting table:


    I cut out a few blanks, just in case I come across another VX body from across the pond one day:


    The first pieces didn't come out quite up to my standards so I started again & nailed it:


    Here is a piece taped up against my on-screen template:


    Much better, right?! I am not going to glue them on just yet. I am contemplating cutting this body into three pieces to adjust the wheelbase by 10 mm. The wheelbase is spot on 1:10 scale as it stands but the overall length is 20 mm too short (based on schematics I have been viewing). A 10 mm stretch would better even out proportions in the rear side windows, front fenders/hood, wheelbase, & overall length. Besides, +10 mm would also bring me to the wheelbase of the chassis kit I have been thinking of using for the future copies... If I do end up cutting it apart I will also dove-tail the rear end a little bit because that fat butt is killing me. As Joe Isuzu said, "Go Farther." It might be time to order that IFS chassis to help me make these decisions before I go... "Too far."

  9. #54
    Member Since
    May 2006
    Location
    SOLD!
    Posts
    7,257
    Thanked: 2
    Back window looks good. It's a shame these VX toys are difficult to find now. If you had like 4 or 5 of them, you could really do some engineering to make a perfect scale VX.

    Bart

  10. #55
    Member Since
    Dec 2005
    Location
    Former Owner of 'ZEUS' aka 1031
    Posts
    3,185
    Thanked: 1
    It continues...
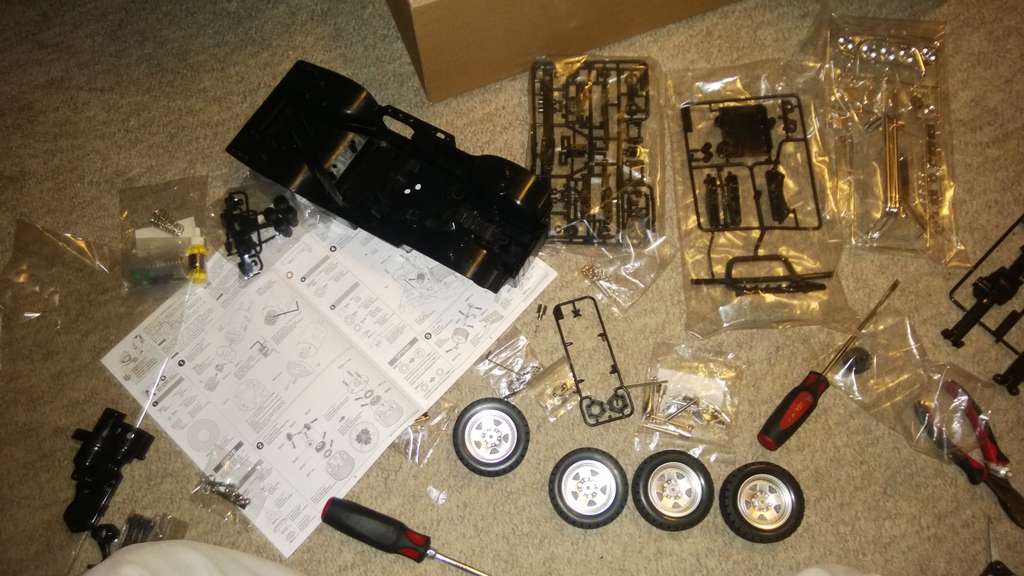
    I ordered a Tamiya CC01 chassis in the "Landfreeder" variety as it is the cheapest option & includes the tires in a 31" size. If I were to recreate some RC VX's for others, this is the chassis I would build upon. It took me about 5 hours to assemble & comes with a motor & esc. It just so happens that the included rims are very similar to what I put on Zeus too!


    Assembled chassis:


    I already knew the stock CC01 wheelbase was 10mm too long for the VX body & here is how much of a difference that is.


    I did not take any pics as I was working on it but I picked up (2) 2.25" long all-thread & screwed on some rod ends to make the shorter lower links. I also took an upper V link from an HPI Wheely King, cut it down, drilled some holes, & screwed in two rod ends there too. I need to make shock brackets on the axle side & cut the driveshaft down. I also figured out a way to lift the chassis-side mount of the lower links for better looks & ground clearance. At least now I have an idea of what is involved to merge VX shell to this chassis if I end up making more of them.


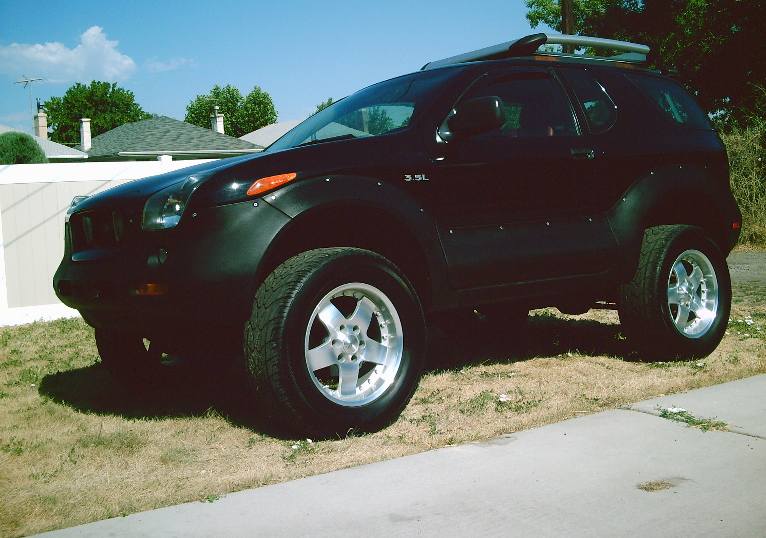
    So Zeus Mini is coming along! Check out the similarity of the wheels & the tire size. Close enough for me!


  11. #56
    Member Since
    Dec 2005
    Location
    Former Owner of 'ZEUS' aka 1031
    Posts
    3,185
    Thanked: 1
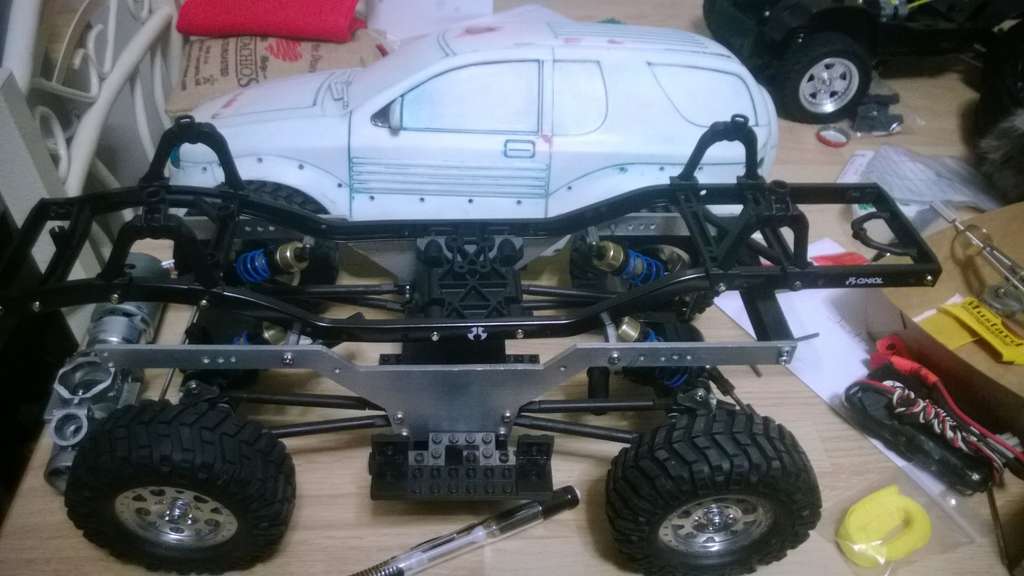
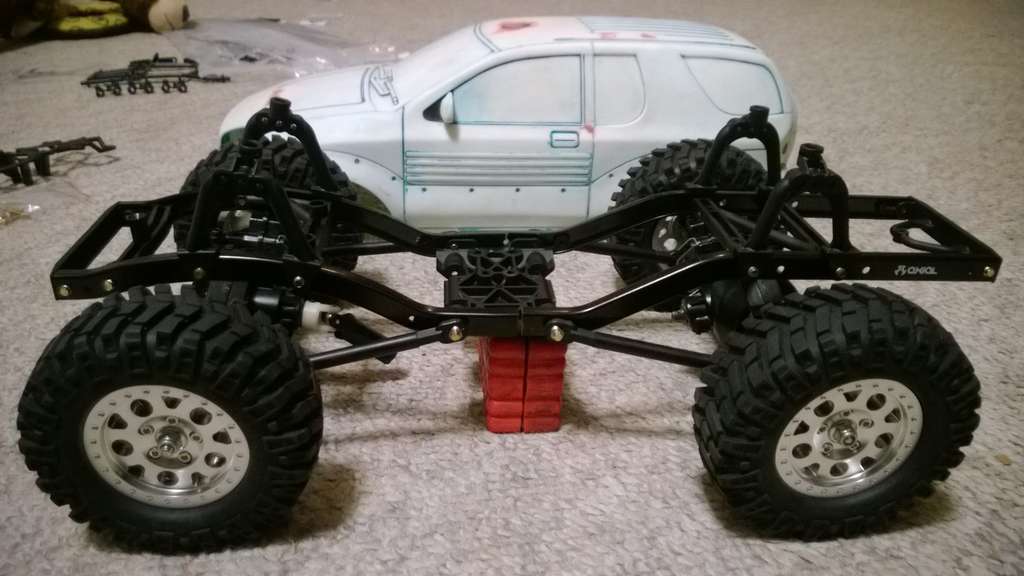
    So then... back to the solid axle chassis! The mock up chassis & setup has served it's purpose but is on its way out for a true frame rail-type chassis. I ordered the frame kit for an Axial SCX-10 crawler to start from. I also ordered a zinc-coated hex-head hardware kit for that extra touch of realism. The problem is the VX wheelbase is so short compared to everything else out there! Jamming everything into a 9.2" wheelbase versus the 11.5-12.5" norm is a bit tight to work with! Here we go:


    See, way too long:


    I got to hacking 2" out of the middle & made a transformer:


    That cut made the frame fit just right within the underside of the shell & it put the shock mounts in a usable location for this wheelbase.


    The next obstacle is driveshaft lengths & angles... I need the most narrow transfer case or transmission I can find in order to have usable driveshafts. So far it seems to be the HPI Wheely King transmission which I just happen to have an extra of! It will not allow me to create an interior though so if I use it, it will be temporary. The new axles I ordered are on backorder with no eta but they cost $300 for the pair! Ouch. The planetary trans I think I want to use is also on backorder, as is the t-case I thought I could use. The t-case may be too thick tho. Fun fun... OH YEAH! ...A driver is also on the way...

  12. #57
    Member Since
    May 2006
    Location
    SOLD!
    Posts
    7,257
    Thanked: 2
    It's coming along good. Can't wait to see it in action! I still haven't ordered my electronics. No moneh.

    Bart

  13. #58
    Member Since
    Jan 2003
    Location
    2001, IronMan White, #440
    Posts
    1,750
    Thanked: 0

    Thumbs up

    Wow! Sweeeeeeeeet!
    Peace.
    Tom
    "Through Great Sacrifice..... Great Rewards Will Be Achieved"

  14. #59
    Member Since
    Dec 2005
    Location
    Former Owner of 'ZEUS' aka 1031
    Posts
    3,185
    Thanked: 1
    Hello again. So this is what a stock Axial SCX-10 / AX-10 transmission & motor mount look like bolted to an SCX-10 skid & frame...


    Another shot. Notice the bulk of the trans & also the funky shaped rod ends.


    NOT GOOD ENOUGH! Luckily, or unluckily, I already decided while this trans was in shipping that I was probably going to be disappointed. So $35 out...


    ...I went for it... I bought the beauty pieces... the extra touch of scale sensuality... ehem... what was I saying?
    Right, the the scale t-case, driveshafts, aluminum links, & stainless rod ends are ... "Oh myyy..."
    I got notice that the steel rod ends I wanted had come into stock & since I was buying something I might as well buy a sheet tonne of stuff.


    Not shown yet is the transmission that connects to this t-case. I'm working on mounting ideas.
    I wanted a certain planetary but got tired of longing for items on back order.
    The axles & the shocks are all that I am waiting for now before I fab up & braze together
    a new skid/t-case mount/link mount, shock mounts, & crossmembers on the frame. Look how cool tho!!

  15. #60
    Member Since
    May 2006
    Location
    SOLD!
    Posts
    7,257
    Thanked: 2
    Nice, how much longer until completion?

    Bart

Similar Threads

  1. Crawler/bogging game?
    By WormGod in forum Chit-Chat ...
    Replies: 6
    Last Post: 06/20/2013, 05:45 PM
  2. RC crawler video
    By Knivx in forum Chit-Chat ...
    Replies: 15
    Last Post: 02/11/2010, 05:04 PM
  3. Resurrecting the Grand Scale TX Meet
    By geshaw30 in forum VX Talk...
    Replies: 33
    Last Post: 04/23/2009, 09:24 AM
  4. Rock Crawler Steel Wheels
    By nfpgasmask in forum VX Talk...
    Replies: 4
    Last Post: 10/31/2006, 09:47 AM

Posting Permissions

  • You may not post new threads
  • You may not post replies
  • You may not post attachments
  • You may not edit your posts
  •  
$lv_vb_eventforums_eventdetails